Monday, September 5, 2016

Crafting Day
Saturday, September 24, 2016, 9:00 AM to 9:00 PM
St Paul Lutheran Church, Cafeteria, 1025 W Lake St, Melrose Park, IL 60160
Cost: $40.00 /per person

Join us for a FULL DAY of scrapbooking, card making, and crafting.
The cost covers half of a 5 foot round table of your own, beverages for the day, snacks, lunch, Dinner and space rental.

It is a day full of FUN with FRIENDS!!
Come and make a card for Halloween or Thanksgiving for free and check out what’s going on, you can make more for a nominal fee.
Go to the meet up group below for more details.

http://www.meetup.com/Marvelous-Paper-Scrapbooking-Cards-Meetup/

or email  Jean Williams   jean1106@att.net.

Saturday, August 27, 2016

6 x 6 Wedding Album

I bought a kit from Creative cuts and crafts in Villa Park. The kit was for a 6 x 6 album for a baby boy. I made the album and I then made 6 x 6 album based on that album. My album has pages with flaps and a flap with pockets and tags that the kit did not. I really enjoyed making the album. Below is a Wedding album I made on the same design.
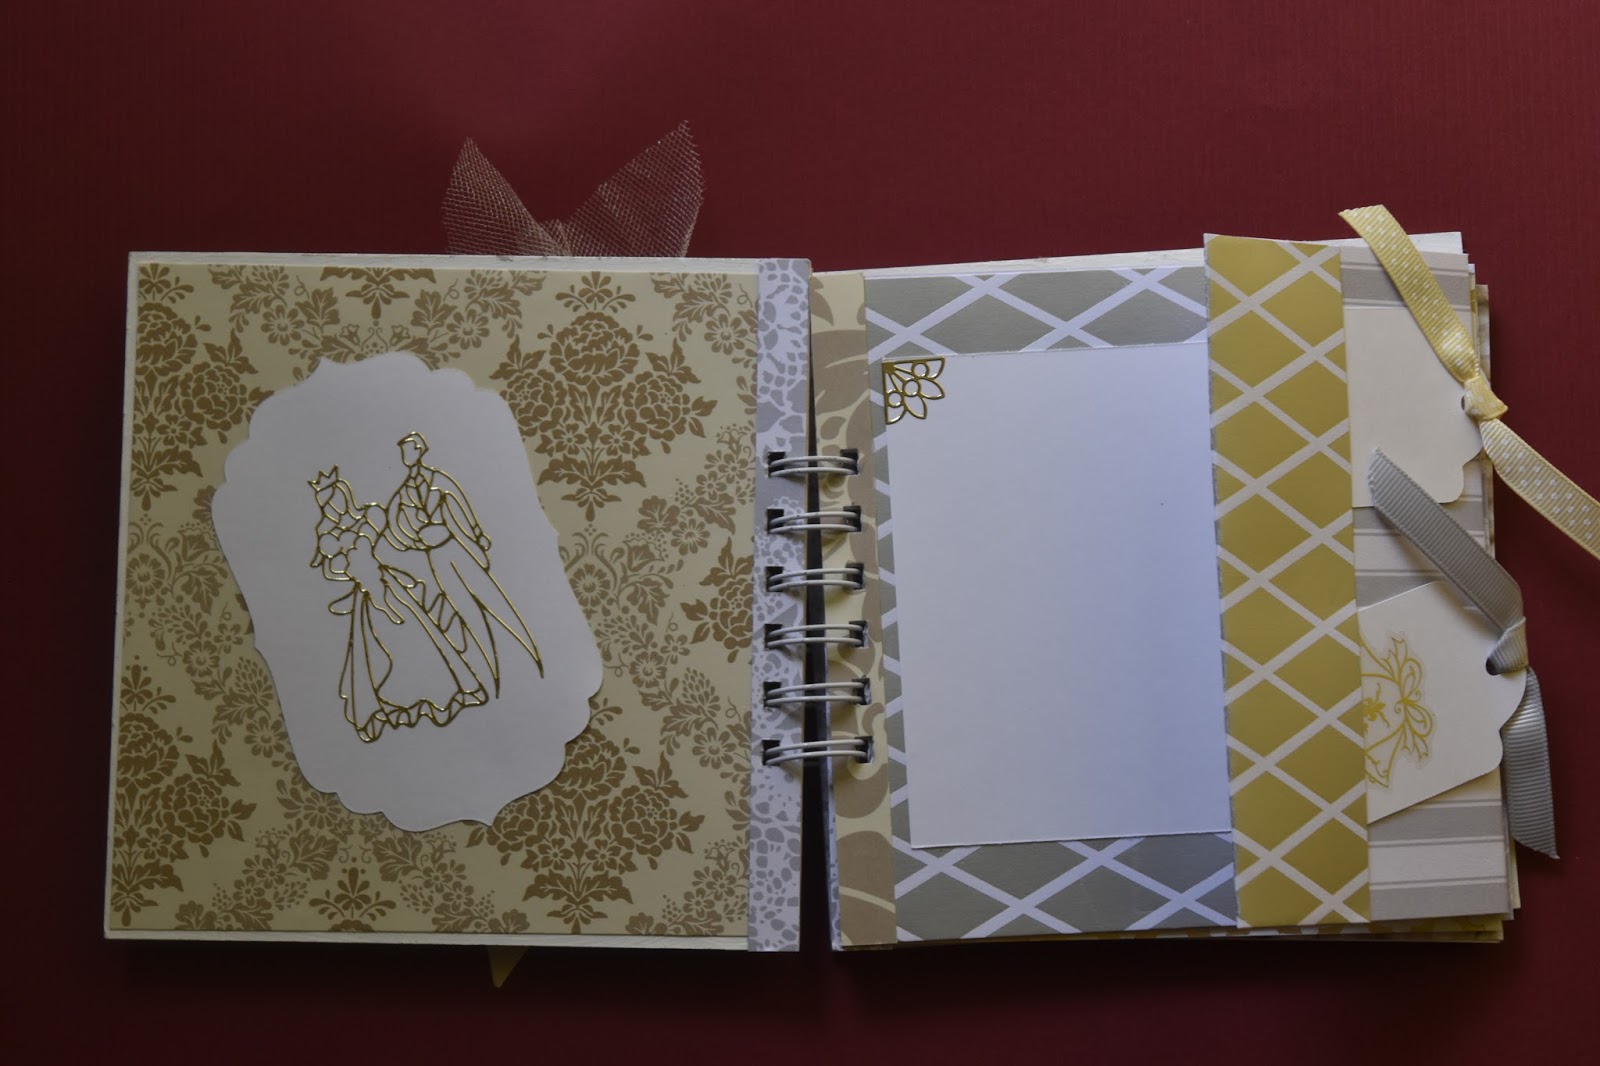
This is the cover of the Wedding album, it is 6 x 6. All the pages measure 5.75 x 5.75 The album is made from a 12 x 12 pack of paper. Depending on the pack of paper you can get 4 to 6 albums from the pack.  You need at least 12 sheets of 12 x 12 heave patterned paper.


This is the inside cover and page 1 with flap on the right with pockets and tags. The pages are made by cutting the 12 x 12 paper into a 5.75  x 12 strips. Then 2 strips are adhered back to back. Strips of coordinating paper are adhered along the binding edge side to reinforce the edge. To create the flap the 5.75 x 12 page is cut to 9.75. The paper is then folded at  5.75 inches to create the flap and folded at 8.75 inches to create the pocket.
 This is pages 2 and 3. Page 2 id the back of page 1 with the flap. Page 3 is without any flaps.
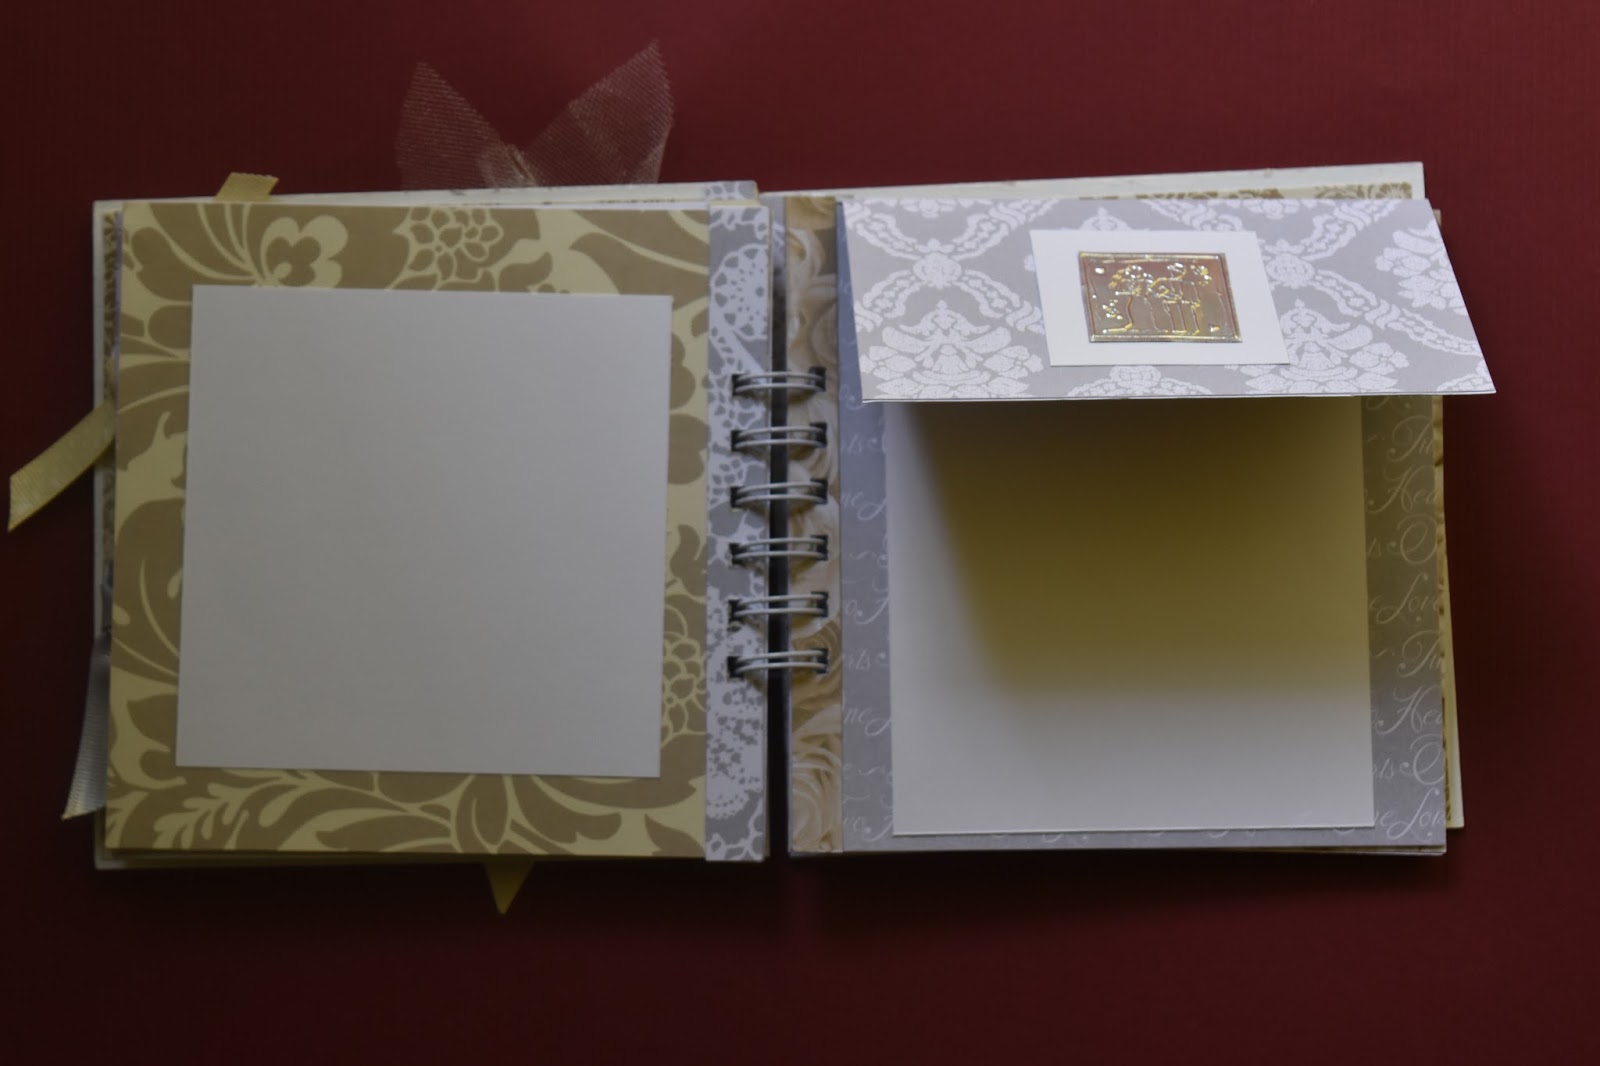
 This is pages 4 and 5. Page 4 is without any flaps. Page 5 has the flap on top. To create the flap the 5.75 x 12 page is cut to 8.75. The paper is then folded at  5.75 inches to create the flap. To allow the flap to move a .5 x 3 inch strip was cut off the inner edge of the 3 inch flap to made room for binding.


 This is pages 6 and 7. Page 7 is without any flaps.

 This is pages 8 and 9. Page 9 has a 3 inch flap on the right side.
  This is pages 10 and the inside back cover.


Here is the back cover. The book was bound using a Bind-it-all and 3/4 inch binding wires. 
The book allows for at least 11 photos. The white photo mounts are 4.25 x 4.25 inches at allow 4 x 4 inch photos.  But that does not mean smaller or larger, up to 5.75 x 5.75 photos could not be added.

I like the book so well that I have made books for baby boys and girls and Christmas books also.

Wednesday, July 20, 2016

Stamping Block Technique

Below are some cards I made using a technique I saw with a stamping block and Tim Holtz ink. 
For the  technique you need an acrylic block and 3 colors of Tim Holtz ink. I found an acrylic block with a scalloped edge that I think looks nice on the card. You dab the ink onto the block, make sure to cover the whole block, lightly spritz it with water and then place the block on the paper to create the background. You need to make sure the block is pressed down firmly to create a good impression. You can spritz with water again and get a second lighter background image.
 
Here you and see the stripes of color in the background. The dog image is from Stampin' up  'The Wilderness Awaits' set.


This background was a second imprint of the block and created a lighter image. Flower stamp from 'Flowering Fields' by Stampin' up.


This background was a first imprint of the block.  The flower stamp is from 'Flowering Fields' by Stampin' up.

This background was a second imprint of the block and created a lighter image.   The flower stamp is from 'Flowering Fields' by Stampin' up.

This time I did not create stripes of color but dabbed the colors in different areas.  The flower stamp is from 'Flowering Fields' by Stampin' up.


Thursday, July 14, 2016

 Stampin' Up Rose Garden die variations.

 I likes this Stampin' Up dies set and wondered what variations I could make using the same die set.
 This card was made with patterned paper and the dies cut from white paper. The white die cut stands out nicely in the paper.

 On this card I attached the white die cut to the dark purple paper and cut around the white die cut. I then attached the purple paper to the lighter card stock.
 On this card I cut out the die cut rose from white paper. I then colored the die cut with markers and attached it to the white card stock.
 The white die cut attached to the white card stock here makes a very nice card.

The last card was made with a black die cut contrasting with the red paper. It stands out nicely on the paper.

Friday, June 24, 2016

Craft Fairs

I am retired now and I and going to enter fairs to see if  I can sell my cards. Below is my booth and a sample of my cards.

My table includes a sign and card displays.
I have 2 umbrella trees to display cards.
I have cards for all ages and types. My cards are all hand made.
 Some I stamp and color with Copic markers.

Others are die cut and stamped.

Tuesday, April 3, 2012

I just took a Stampscape mega class at Peddlers Den. I created 14 cards.
 The first four where created by brayering the background and then adding the Stampscape stamps.


Then we created 3 cards stamping the background with minimal masking.


We created 3 cards masking the main feature and the moon.we colored the cards with the stylus.


We created 2 cards that are winter scene with glitter added.


The last 2 cards required more masking and were colored with the stylus.


Wednesday, March 21, 2012

I colored this Stampscape scene with pan pastels. I like the way it gave a soft but virbrant color to the scene.